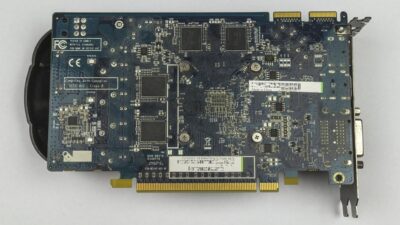
Overclocking your Radeon graphics card can significantly enhance your gaming experience by unlocking extra performance beyond factory settings. Whether you’re a seasoned enthusiast or a newcomer to PC optimization, this guide will walk you through the essential tips and tricks to safely overclock your GPU for maximum performance.
Understanding Overclocking
Overclocking involves increasing the clock speeds of your GPU and memory to achieve better performance in applications and games. By pushing these components beyond their stock limits, you can get more frames per second (FPS) and better overall graphics quality. However, it’s essential to understand that overclocking can also lead to increased heat output and power consumption, so proceed with caution.
Prerequisites
Before diving into the overclocking process, ensure that you have the following:
- A compatible Radeon graphics card: Ensure your model supports overclocking.
- Updated drivers: Install the latest AMD drivers for your graphics card from the official AMD website.
- Monitoring software: Tools like MSI Afterburner, GPU-Z, or AMD’s Radeon Software Adrenalin are essential for tracking performance and temperatures.
- Stability testing software: Programs like Unigine Heaven or 3DMark will help you benchmark and test stability after overclocking.
Step-by-Step Overclocking Process
1. Benchmark Your Baseline Performance
Before making any adjustments, it’s crucial to benchmark your current performance. Run a few sessions of demanding games or synthetic benchmarks to establish your GPU’s baseline performance metrics (FPS, temperature, and power consumption). Record this data for future comparison.
2. Open Your Overclocking Software
Most users opt for MSI Afterburner due to its user-friendly interface and comprehensive feature set. Open the tool, and familiarize yourself with the following sliders:
- Core Clock: Adjusts the speed of the GPU.
- Memory Clock: Changes the memory speed.
- Fan Speed: Controls the graphic card’s cooling.
- Voltage: Increases the power supplied to the GPU.
3. Increase Core Clock Speed
Start by slowly increasing the Core Clock speed. A safe increment is typically between 10-20 MHz at a time. After each adjustment, apply the settings and run a benchmark to test for stability. Monitor for artifacts (visual glitches) or crashes, which indicate instability. If you encounter these issues, back down to the last stable clock speed.
4. Adjust Memory Clock Speed
Once you’ve found a stable Core Clock setting, move on to the Memory Clock. Similar to the Core Clock, increase the Memory Clock speed in small increments (up to 50 MHz). Test stability with benchmarks after each adjustment. Be cautious; memory overclocking can lead to more noticeable artifacts.
5. Tune Fan Speed and Monitor Temperatures
As you increase clock speeds, the temperatures will rise. To combat this, you can manually set the fan speed to a higher percentage to ensure effective cooling. Monitor temperature levels closely; ideally, you want to keep them under 80°C to maintain component longevity.
6. Test for Stability
After you’ve found your desired settings, run extended testing sessions with stability software. Aim for at least one hour of stress testing to ensure your system will perform reliably during long gaming sessions. Pay attention to temperature, power consumption, and performance.
7. Fine-tune as Needed
If you encounter instability during gaming sessions or stress tests, it may be necessary to revert to a more conservative overclock or adjust the voltage (if your card supports it). However, be cautious when adjusting voltages; too much increase can damage your GPU.
8. Monitor in Real Time
Use in-game overlays or GPU monitoring tools to check real-time temperatures and performance while gaming. Keeping an eye on these metrics will help you make further adjustments as needed.
Tips for Successful Overclocking
- Incremental Changes: Always make small adjustments to avoid instability and damage to your hardware.
- Cooling Solutions: If you notice high temperatures, consider improving case airflow or installing a better aftermarket cooler.
- Power Supply: Ensure your power supply unit (PSU) can handle the increased load, as overclocking will result in higher power consumption.
Conclusion
Overclocking your Radeon GPU can be an exhilarating way to extract every ounce of performance from your system. By following this guide and employing meticulous monitoring, you can enjoy enhanced graphics and improved performance in your favorite games. Always remember that every GPU is unique, so take the time to test settings thoroughly, and remain mindful of temperatures and stability. Happy gaming!

