In the age of social media, where the visual appeal often dictates a dish’s popularity, mastering food photography has become an essential skill for chefs, food bloggers, and culinary enthusiasts alike. An aesthetically pleasing image can capture attention, evoke appetite, and share a story, transforming a simple meal into an experience. Here’s how to make your culinary creations shine through the lens.
1. Understand Your Light Source
Lighting is the cornerstone of stunning photography. Natural light is often the best option for food photography, as it enhances colors and textures. Set up near a window to take advantage of soft, diffused sunlight. Avoid harsh overhead lights that can create unflattering shadows and highlights.
- Best Practices:
- Shoot during the golden hour (early morning or late afternoon) for warm, flattering light.
- Use sheer curtains to diffuse direct sunlight if it’s too strong.
2. Choose the Right Background
The background of your shot can either elevate or detract from your dish. Neutral or minimalist backgrounds work well to highlight the food, while textured surfaces like wooden tables or rustic textiles can add warmth and character.
- Tips:
- White or light-colored surfaces can enhance the freshness of the food.
- Consider using a contrasting backdrop to make your dish pop.
3. Use Props Wisely
Props can enhance your story but should never overshadow the dish itself. Plates, utensils, napkins, and ingredients should complement the food rather than compete with it.
- Suggestions:
- Stick to a cohesive color palette for consistency.
- Include ingredients or tools that relate to the dish—for example, fresh herbs or spices next to a completed recipe.
4. Focus on Composition
The composition of your photograph is crucial. The rule of thirds is a timeless guideline that suggests dividing your frame into a 3×3 grid and placing the subject along these lines or intersections. Experiment with different angles:
- Top-Down: Great for flat lays and dishes like salads or pizzas.
- 45-Degree Angle: Ideal for layered foods, like burgers or cakes.
- Eye-Level: Best for capturing height and details, particularly in drinks or tall desserts.
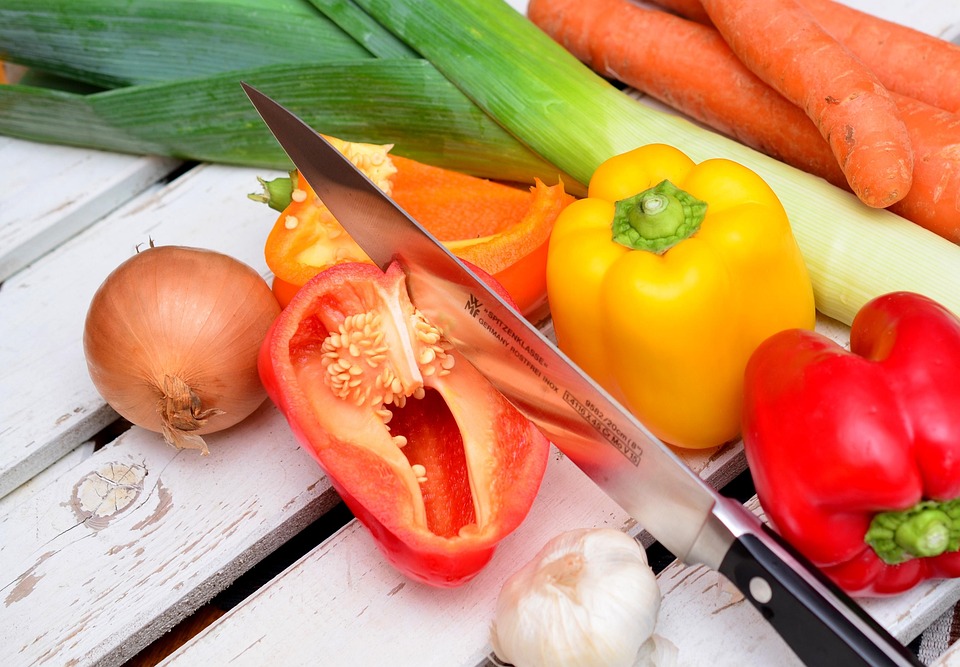
5. Generate Appeal with Color and Texture
Colors deepen the visual allure of food. Vibrant, fresh ingredients can brighten an image, while contrasting textures (smooth sauces against crispy elements) create depth.
- Techniques:
- Incorporate a variety of colors—for instance, fresh greens with rich reds and yellows.
- Highlight textures with close-up shots that convey the quality of the food.
6. Experiment with Editing
Post-processing is an opportunity to enhance your photos significantly. Use editing software or apps to adjust brightness, contrast, saturation, and sharpness. However, aim for authenticity; food should look appetizing and true to life, not overly manipulated.
7. Capture the Process
A great story often lies in the making of a dish. Documenting the cooking process can provide context and make your audience feel more connected to your culinary journey. Include in-progress shots, such as chopping veggies or stirring a pot.
8. Practice Patience
Food photography can be a trial-and-error process. The more you shoot, the more you’ll learn about what works best for your style and how to effectively showcase your dishes. Don’t rush the process—take your time to set up your shot and adjust elements as needed.
Conclusion
Food photography is more than just snapping a few pictures; it’s about creating a visual feast that tells a story and ignites the senses. With the right techniques, lighting, and a bit of creativity, you can make your culinary creations irresistible. Whether you’re sharing on social media or building a portfolio, let your passion for food shine through each shot. Now, grab your camera and start capturing the deliciousness!