In a world where Instagram feeds are filled with pristine images of delicious dishes, it’s no wonder that home cooks and food enthusiasts want to capture the essence of their culinary creations. Fortunately, you don’t need a professional studio or expensive equipment to take stunning food photographs. With a little creativity and resourcefulness, you can elevate your food photography game without breaking the bank. Here’s how to effectively transition from your kitchen to the camera.
Understanding the Basics
Lighting
One of the most critical aspects of food photography is lighting. Natural light is your best friend—it’s free and can create beautiful, soft shadows and highlights that enhance your dishes.
- Window Light: Set your food near a window. The north-facing windows are particularly good as they offer consistent and diffuse light.
- Avoid Direct Sunlight: Direct sunlight can cause harsh shadows and overly bright spots. Opt for an overcast day or use sheer curtains to soften the light.
Composition
The arrangement of your food and props can significantly influence the visual appeal.
- Rule of Thirds: Position your main subject off-center by imagining a grid of nine squares. This technique makes your photos more dynamic.
- Props: Use utensils, napkins, and cutting boards that complement your dish. Stick to a consistent color palette to create a cohesive look.
DIY Equipment
You don’t need fancy gear to get stunning shots. Here are budget-friendly options that can dramatically improve your photography.
Camera
- Smartphones: Most smartphones have excellent camera capabilities these days. Take advantage of your phone’s pro settings for better control over focus and exposure.
- Tripod: A simple tripod helps stabilize your shots for clearer images. You can find affordable options online or consider making a DIY version with household items.
Reflectors
Reflectors can bounce light onto your food for an even more appealing look.
- White Foam Board: An inexpensive piece of white foam board can serve as a reflector. Simply position it opposite your light source to add subtle brightness to your dish.
- Aluminum Foil: Crumple up some foil to create a reflective surface, or use it on cardboard to enhance contrast and brightness.
Backgrounds
Using textured or colored backgrounds can help showcase your food beautifully.
- Old Wooden Boards: A rustic wooden board or table surface can add charm and depth to your photography.
- Fabric and Paper: Consider using a plain or patterned fabric as a background. Wrapping paper or poster boards can serve as affordable backdrops as well.
Styling Your Food
Food styling is key in making your dishes look appetizing.
Fresh Ingredients
Consider using fresh herbs, colorful fruits, or garnishing to make your dishes pop. Simple changes, like adding a sprinkle of herbs or drizzling a sauce, can enhance the visual appeal.
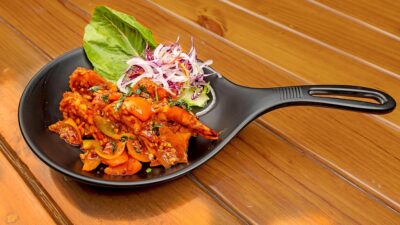
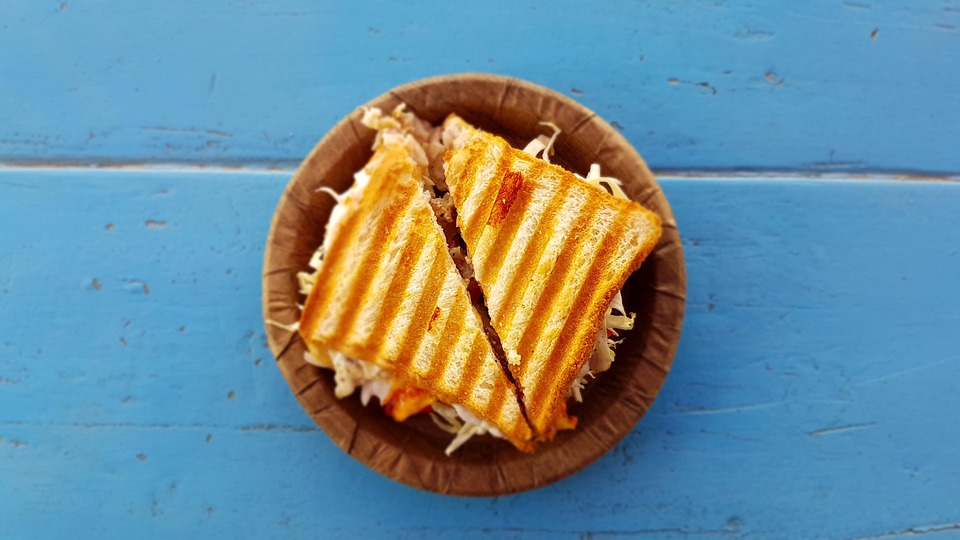
Serving Dishes
The type of dish you use can alter the perception of the food. Contrasting colors can make the food stand out: a colorful salad in a neutral bowl can attract attention.
Layering
Try layering ingredients to add dimension. A slice of cake or a bowl of layered parfaits can be visually enticing.
Editing
Once you’ve captured the perfect shot, a little editing can go a long way.
- Free Editing Apps: Use free apps like Snapseed or Lightroom Mobile to enhance brightness, contrast, saturation, and sharpness.
- Filters: Filters can create mood and consistency for your food photos. Just be cautious—overdoing it can detract from the natural beauty of your dishes.
Sharing Your Photos
Once your photos are edited to perfection, it’s time to share them with the world.
- Instagram: Utilize relevant hashtags to increase visibility. Engage with the community by liking and commenting on other food bloggers’ posts.
- Food Blogs: Consider starting a blog to showcase your best work. Platforms like WordPress and Wix offer free templates that can help you get started.
Conclusion
Capturing beautiful food photography on a budget is entirely achievable with a bit of creativity and resourcefulness. By making the most of what you have on hand, understanding the basics of lighting and composition, and utilizing DIY equipment, you’ll be well on your way to creating mouthwatering images. So roll up your sleeves, get cooking, and let your culinary artistry shine through your photography!